Showing posts with label Home Baked. Show all posts

Saturday, 28 November 2020

ONE BOWL BANANA BREAD


Yes! Third post on Banana bread. The first was a Banana Walnut Cake, the second an Eggless, Whole Wheat one and now this. I think I’d pick this recipe over the first Banana Walnut Cake. The whole wheat one besides being eggless, also has a nutty flavour imparted by the whole wheat and the walnut streusel topping,  hence cannot be compared to this recipe.


While I do love a slice (or three) of Banana Bread, I avoid repeating recipes since I need to have new ones for the blog. Why, then, so many Banana Bread recipes, you may wonder?

The Bananas at my place ripen overnight (!) and the minute brown spots appear on them, Skip and Sky turn their nose up and walk away in spite of my frequent lectures on spotted bananas being heathier. I had 5 overripe bananas lying in the fridge. I came across a new recipe from Food Network Canada shared on Facebook and decided to try it (There is only so much mashed banana that one can use as hair mask).


Such a feeling of joy when you come across a great recipe. Skip declared this to be the best banana cake I’ve baked and I agree. It is moist and so flavourful. I love adding walnuts to banana breads, you could add chocolate too.


BANANA BREAD


Ingredients:

Ripe Bananas  - 3 (large)

Unsalted butter – 6 tbsp

Granulated sugar – ½ cup

Light brown sugar – ½ cup

Egg - 1

Vanilla essence – 1 tsp

All purpose flour(maida)  – 1 ½ cups

Baking soda- 1 tsp

Salt – a pinch

Walnuts/chocolate chips – 1 cup (optional)


Method:


1.     Preheat oven at 180C. Grease and flour a baking dish.

2.     Melt the butter and set aside.

3.     Hand mash the bananas with a fork. Add the melted butter to it and mix well.

4.     Add the sugars and mix well.

5.     Add the egg and vanilla essence and mix well.

6.    Sift the all purpose flour, soda and salt and add to the mixing bowl above. Use a spatula or wooden spoon to gently blend all the ingredients together.

7.     Add the walnuts or chocolate chips and mix it gently.

8.     Bake at 180C for about 45-50 minutes.

9.     Done.


Recipe Notes:

·       I used granulated brown sugar instead of light brown.

·       I added walnuts because they taste great with banana bread.


Thursday, 12 November 2020

PEAR CRISP


29.10.2020: If you would recall from my last post on Pears (Pear Cobbler), I had some extra poached pears left over from the Cobbler. I refrigerated it overnight and used it the next day to make this Crisp.

I followed the quantities mentioned in the recipe and ended up with extra topping. Not wanting to again, store the toppings, I dumped it all on the poached pears. Also, the amount of peanut butter wasn’t clear in the recipe. It appeared as 1 cup which I thought was too much and noticed the same pointed out in the comment section. So I ended up putting too little of it. Halfway through baking, I pulled the dish out and added some more peanut butter and ended up making a bit of a mess which I have expertly covered with ice cream and a flower :D in the picture.

The quantities mentioned below are perfect for a 5-6 inch baking dish. You can easily adjust the quantities as per the size of your dish.

Skip said this was better than the Apple Crisp as the crust had a lovely peanut butter flavour. You can use any recipe for a Crisp and substitute plain butter with peanut butter. We had it warm with a scoop of mango ice cream (vanilla wasn’t available!!!)


Now that Skip and I spend a lot of time with each other, there are days when we get on each other’s nerves and end up quarrelling like siblings. I hadn’t realised that I ask Skip to not act stupid when he misbehaves. The other day when I said ‘stupid’ in anger, Skip looked hurt and said that he wasn’t one and that I shouldn’t keep calling him that. I felt rotten, I didn’t want my son growing up thinking he was stupid because his mother called him that thoughtlessly in a fit of anger. In the evening I called him aside and apologised and explained that I used the word ‘stupid’ merely to express my anger at him and that it was wrong to do so. We sat and pondered for a bit over what word I could use instead. We have decided on using the word ‘gemstone’ (there’s really no reason for having chosen that word). So now, when he doesn’t behave, I call out gemstone and he rolls his eyes, stops the mischief and pretends to sulk but I have noticed a little smile creep across his face.


PEAR CRISP

Ingredients:

Pears – 2

Ground cinnamon – ½ tsp

Sugar – 2 tbsp

Oats – ¼ cup

Whole wheat flour – 2 tbsp

Chunky sweetened peanut butter (cold) – 4-5 tbsp

Nuts/seeds – optional


Method:

1.     Toast the oats either on a pan or in the oven for 5-8 minutes until they turn golden brown.

2.     In a saucepan, add chopped pears, sugar and cinnamon and cook on medium heat until the sugar melts and the pears soften.

3.    In another bowl, combine the oats and wheat flour (and nuts/seeds). Add the peanut butter in batches and rub the mixture between your fingers until it resembles bread crumbs (chunky bread crumbs). If you feel the need to add more peanut butter, please do so. The mixture shouldn’t be dry.

4. Transfer the cooked pears into the baking dish ( I used a 6 inch dish). Evenly sprinkle the peanut butter mixture over it  and bake it at 180 C for about 20 minutes until the top layer has browned.

5.     Done.


Sunday, 1 November 2020

PEAR COBBLER


28.10.2020: Shugu sent me a bag full of juicy pears and I immediately set about looking for some pear recipes. After a few minutes of scrolling and not having found anything to my liking, I googled peach cobbler and came across this recipe by Preppy Kitchen. I replaced pears with peaches.

The recipe calls for using a 9*13 inch dish. While I flitted about in the kitchen waiting for the butter to melt in the dish, I realised that the flour batter wouldn’t be enough for a dish this large and I didn’t want to eat a flimsy, thin slice of cobbler. I transferred the melted butter into an 8 inch baking dish and poured the flour batter into it only to then realise that I had chopped too many pears. I set aside a quarter of the pears. I will soon be posting the recipe for a Pear Crisp. Be sure to follow me on Facebook and Instagram @lucidlucent. This crisp calls for something different from the regular recipes for a Fruit Crisp. I also have the  recipe for an Apple Crisp on my blog.

Doesn’t this Cobbler look so pretty with its uneven, bumpy surface? The top feels like a springy cake and base has sweetened, sticky pears. I wanted to have it with a scoop of vanilla ice cream, but the thought itself of walking 100 metres to the store close by tired me out. 


You may have it plain or have it warm with ice cream, either way it tastes delicious.  


 PEAR COBBLER  

Ingredients:

For the pears:

Pears – 4 yellow ripe ones

Granulated sugar – ¼ cup (50 gms)

Brown sugar – ½ cup (50 gms)

For the cobbler:

Butter – 7 tbsp

All-purpose flour (maida) – 1 cup

Granulated sugar – ¾ cup

Baking powder – 2 tsp

Salt – ¼ tsp

Milk – ¾ cup

Cinnamon – ½ tsp


Method:

1.     Preheat the oven to 180C.

2.  Chop the pears into bite sized pieces (or smaller) and transfer to a pan. Add the granulated and brown sugar to it. Mix well. Heat on medium flame for about 5 minutes until the sugars dissolve and the pears are partially cooked in the sugar syrup. Set aside.

3.     Place the butter in the baking dish and pop it into the oven. In the ‘warm’ mode let the butter melt. Set aside.

4.     In a mixing bowl, mix the flour, sugar, salt, baking powder and cinnamon. Pour in the milk and mix till no lumps are visible.

5.   Transfer this batter to the baking dish with butter. Do not mix but spread the batter to cover the edges.

6.  Transfer the pears along with the liquid onto this batter. Again, do not mix but spread it evenly making sure to leave some gaps between the pear bits.

7.     Bake at 180C for about 40 mins or until done.

8.     Done.


       Recipe Notes:


·       If you don’t have cinnamon, you may use cardamom powder or vanilla essence.


Tuesday, 20 October 2020

EGGLESS WHITE CHOCOLATE BLONDIE


11.10.2020: I have never liked white chocolate. Even as a child when I was of the age when anything sugary that had the word chocolate in it was a source of immense pleasure, I stayed away from Milkybar (give me the power!).

I accidently bought a bar of white chocolate instead of dark chocolate. When I enter a departmental store, I’m like a kid in a candy store. I love walking up and down the aisles, checking out all the jams and sauces and preservatives and snacks and biscuits and during this period, I oft confuse brands and products and realise my mistake only after I return home.

The bar was lying in the fridge, having used only a quarter of it for decorating desserts. I decided to make Blondies with it. I was always under the impression that a Brownie with white chocolate was called a Blondie, I have however come across recipes for Blondies with ‘brown’ chocolate too. If someone would like to clarify this, please drop a comment in the comment section below.

This recipe is adapted from ‘From Noopur’s Kitchen’ and its eggless !


I have always loved chewy desserts. I may have over baked the Blondie by 5 minutes and its edges got a bit crunchy but then I love crunchy edges. The white chocolate lends a wonderful flavour and the walnuts a lovely crunch. If you are planning to store this in the fridge, please let it come to room temperature before you eat it. Let the Blondie cool completely before you cut it into squares else it will crumble.


EGGLESS WHITE CHOCOLATE BLONDIE

Ingredients:

All purpose flour (Maida) – 120 gms ( 1 cup plus 2 tbsps)

Cornflour – about 25 gms (2.5 tbsp)

Butter -  56 gms ( ¼ cups)

Light brown sugar – 4 tbsp

Condensed milk – 150 ml

Baking powder – 1 tsp

Baking soda – ½ tsp

Vanilla essence – 1 tsp

Milk -1/2 cup

Vinegar – 1 tbsp

White chocolate chips/chunks – 75 gms

Walnuts (chopped) – about 20

Caramel sauce (optional)

Sea salt (optional)


Method:

1.     Preheat the oven to 180C and grease an 8-inch baking dish.

2.     Melt the butter and let it cool slightly.

3.    Sieve the dry ingredients ( flour, cornflour, baking powder, baking soda) at least 5 times.

4.   Chop the white chocolate and walnut and add about 2 tbsps of the above flour mixture to this, mix well and set aside.

5.   To the melted and cooled butter, add condensed milk and mix it well. To this add milk, vanilla extract and vinegar. Add the brown sugar and milk well.

6.   Add the dry ingredients( from Step 3) to the wet and mix until there are no lumps. Do not overmix.

7.     Add the chocolate and walnuts from Step 4.

8.   Pour into the greased tin. You may also scatter some white chocolate on top or drizzle caramel sauce on the batter and sprinkle a little sea salt.

9.     Bake for about 30-35 minutes or until the skewer inserted comes out clean.

10. Done.


Thursday, 15 October 2020

EGGLESS DATE AND WALNUT CAKE


 07.10.2020: The past few years I’ve had many requests for eggless cakes but I’ve always avoided making eggless bakes under the (false) presumption that cakes with eggs would be fluffier and lighter. The Eggless Banana Bread with Walnut Streusel put an end to these preconceived notions and while I still don’t specifically go about looking for eggless recipes, I’ve been more open to trying these eggless cakes if I happen to come across them.

My mother used to bake a scrumptious, sticky Date Cake which was rich and decadent and had the strong caramel taste of dates. Though she has sent me the recipe for it thrice already, I keep inadvertently deleting the message (If you are reading this, please send it again).

I always have a box of dates lying about in the house. For some reason, my father in law and my mother think that Skip loves dates and send me a box once in a while. Even though I know Skip hates dates and I have cause to believe that my skin breaks out when I eat them, I buy a box because I like to stock up on healthy food ( It’s not just Haldirams and Laxmi Narayans ðŸ˜‰).


I had two boxes of dates in the house and was looking for recipes with Dates when I came across this recipe on lovenadflourbyPooja. I follow her on Instagram as she has some amazing recipes. You may check out the Eggless Lemon Loaf that I baked following her recipe.

I also have a recipe for Bliss Balls saved which I plan to make soon. Please do follow me on Facebook and Instagram @lucidlucent and you’d be notified when that post goes up.

This cake is definitely one of the best cakes I’ve baked. It is moist, has a wonderful (but not too strong) flavour of dates. Skip loved it too, even after I told him it had dates. At times, I skip adding nuts to cakes, but I would highly recommend adding walnuts as it tastes wonderful with dates.


EGGLESS DATE AND WALNUT CAKE

Ingredients:

Chopped and Pitted dates- 1 cup

Milk – 1 cup

Sugar – 3 tbsp

Oil – 1/3 cup

Flour – 1 cup

Baking powder- ½ tsp

Baking powder – ½ tsp

Walnuts – ½ cup


Method:

1.     Preheat the oven to 180C and grease a 6 or 7 inch baking dish.

2.     Soak ½ cup of the dates in half a cup of hot milk for at least an hour and then grind it into a smooth paste.

3. To the above date paste, add oil, sugar and remaining milk and mix well with a whisk.

4.  In a separate bowl, sieve flour, baking powder and baking soda. To this, add the remaining dates and walnuts and mix well until the dates and walnuts are covered in the flour mixture.

5. Add the flour mixture to the wet ingredients and mix until streaks of flour disappear.

6.     Transfer to the baking dish and bake for about 35-40 mins or until done.

7.     Done.


Monday, 28 September 2020

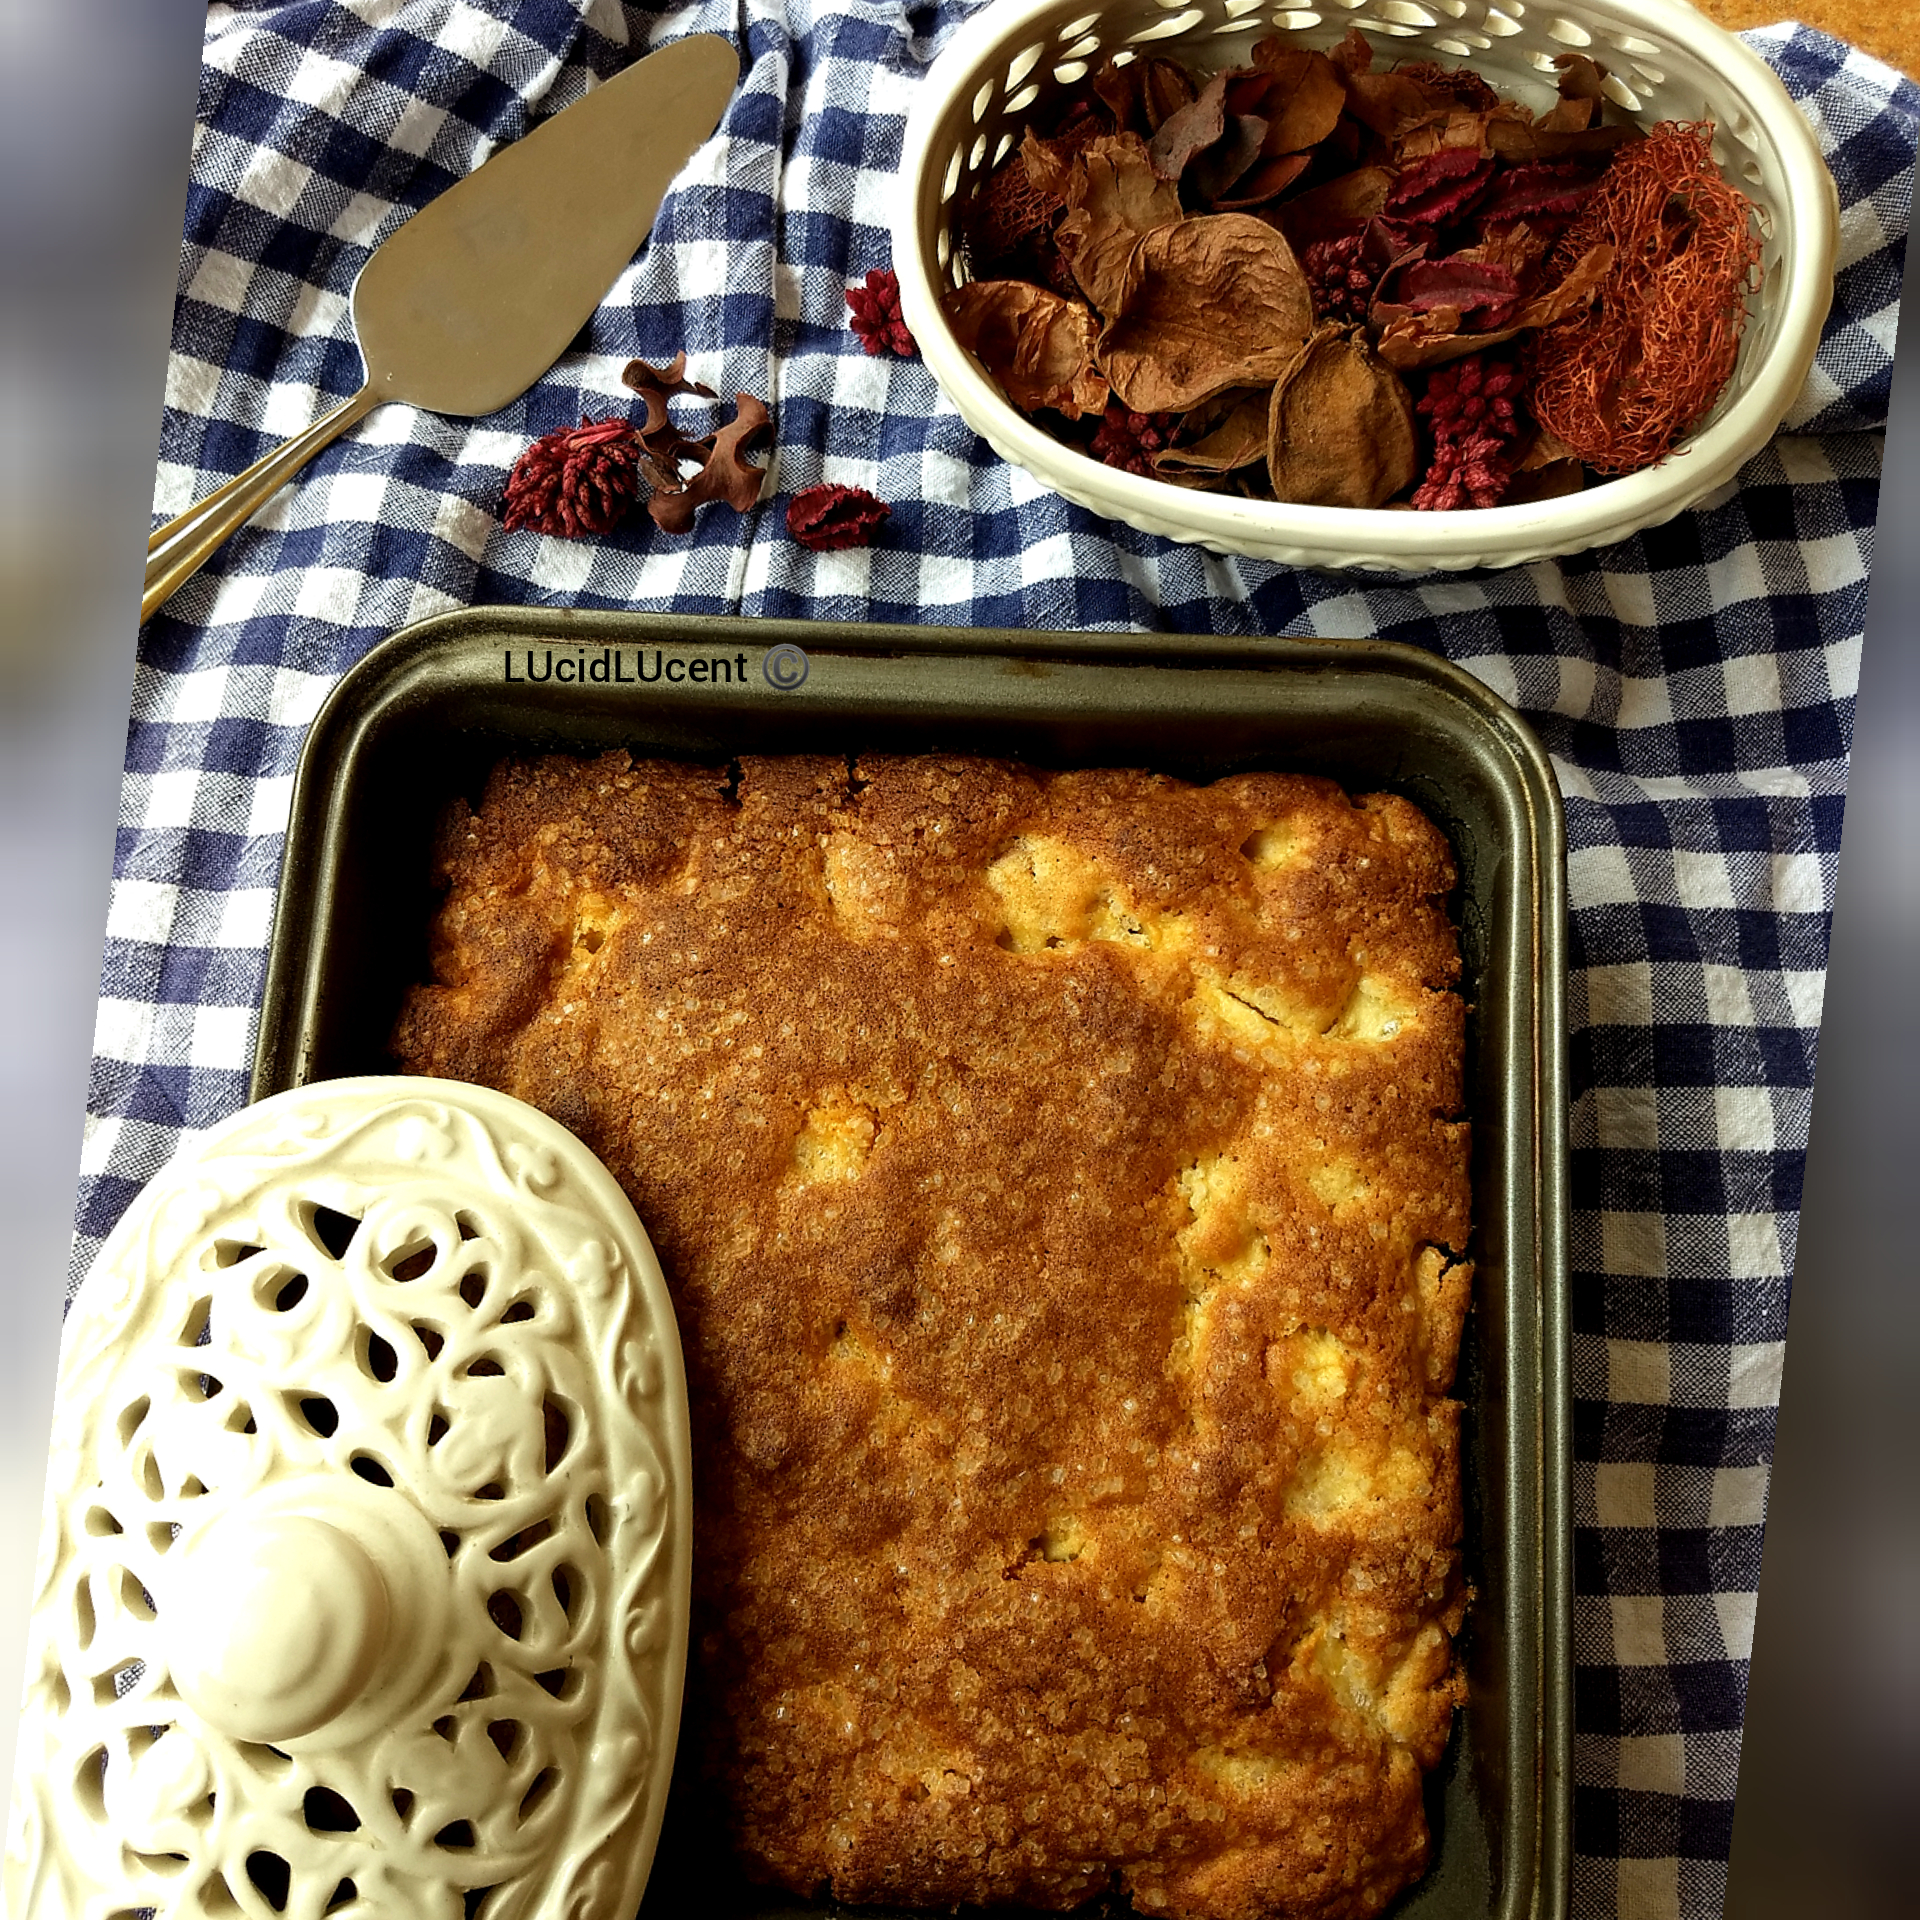
FRENCH APPLE CAKE


26.09.2020: About 5 years ago, I had come across the recipe for the French Apple Cake which I had saved on my phone. During one particularly tiresome day, when I was feeding a fussy 3-year old Skip and not even his favourite Red Riding Hood video came to the rescue, I handed over the phone to him only to later find my entire folder of recipes deleted!

Out of sight, out of mind. This recipe had completely slipped my mind until...

A few days ago, when I opened the fridge for a regular inspection to check what items were left ignored or hidden away behind frequently used items, I found apples, nestled amongst little cartons of spices. In no mood to eat apples as is, I decided to bake a cake with them instead.

As I scrolled through many recipes, wondering which one would work best, I decided to bake the one from ‘Pardon your French’.


Then began the search for the liquor. We hardly ever have Dark Rum, Cognac or Brandy at home. After a little looksie here and there, Sky got a little bottle of Armagnac. After a quick search on liquor substitutes, I decided to go ahead with the Armagnac but poured a negligible quantity (about 10ml) to the cake. (I should have poured more). If you do not want to use alcohol, you may substitute it with apple juice but a classic French Apple Cake is one with a buttery, Rum flavoured crumb.


This cake is the most delicious of all the apple cakes I’ve ever baked. The melted butter forms a wonderful crust on the cake, the sugar sprinkled on top adds a lovely crunch (though it doesn’t help aesthetically, in my opinion) and the cake in itself is buttery and crumbly and fluffy with sweet, softened apples.

I am not a big fan of apples, but I do love them in desserts!


FRENCH APPLE CAKE

Ingredients:

Apples- 2 regular sized

Unsalted butter – ½ cup (125 gms)

All-purpose flour (maida) – 1 cup (125 gms)

Baking powder – 1 tsp

Salt – a pinch 

Eggs – 2

Granulated sugar – ¾ cup (150 gms) + 2 tbsps

Vanilla essence – 1 tsp

Dark rum/cognac – 3 tbsps (45 ml)


Method:

1.     Preheat your oven to 180C and prepare your baking dish. (I used an 8 inch pan).

2.     Melt the butter. Set aside and let it cool.

3.     Peel and core the apples and chop them into tiny pieces (about ½ an inch). (If you like your cake to have chunky pieces, dice the applies into bite sized portions).

4.     Sieve the flour, baking powder and salt.

5.     In a mixing bowl, beat the eggs with the 150 gms sugar for about 8 minutes until it is light and fluffy and doubles in volume. (I used an electric beater for this).

6.     With a rubber spatula or a whisk, gently stir in the vanilla and the alcohol.

7.     To this, add half the flour mixture and gently stir. Add in half the melted butter and stir. Stir in the remaining flour mixture, stir and then the remaining melted butter. DO NOT OVERMIX.

8.     Fold in the apples and stir until the pieces are evenly coated with the batter.

9.     Pour into the baking dish and sprinkle the 2 tbsps sugar evenly on top of the batter. Bake at 180C for about 40 minutes or until done.

10. Done.


Wednesday, 23 September 2020

EGGLESS LEMON LOAF


21.09.2020: I have been spending more time on trying to click better pictures for the blog and have painstakingly been segregating items of clothing, showpieces, utensils for these pictures. As I go through other blogs, scrutinising their pictures, I make a mental note to purchase dried rose petals, bits of jute with frayed ends, black serving dishes, wooden slabs, bark coasters…. Pheew! While these items continue to remain on my Amazon  wishlist, I continue using random sweaters and leaves for my photography.

As I scrolled through my gallery looking for appealing food pictures to post on the blog, I realised the old ones did not match up to the current ‘pretty’ ones. The next morning, I took the butter out of the freezer and placed it on the kitchen slab. When Skip spotted it, he jumped with joy saying “cake, cake”. I told him I was not to be disturbed as I wanted to bake this soon and get back to my office work.

I have gotten quite adventurous during this period of work from home. Yes! Eggless baking is me being experimental. :D I came across this wonderful recipe for the eggless Lemon Loaf on Love and Flour by Pooja.


I love lemony desserts. The tangier it is, the more appealing I find it.

This cake is so buttery soft with the perfect hint of sweetness and citrusy flavour. The lemon frosting is tangy and the kind that gets you smacking your lips after a bite. Mmhhmm… so good.

Mamma asked me what the egg substitute was and from what I’ve read on the net, typically yoghurt, banana, condensed milk or flax seeds is used. I suppose the combination of milk and lemon (which is how I make Buttermilk at home for bakes) makes this cake so fluffy and crumbly.

Do try it out and if you enjoy it as well, you know what to do 😉.


EGGLESS LEMON LOAF

Ingredients:
All-purpose flour (maida) – 250 gms (1 ¾ cups )
Baking powder – 1.5 tsp
Baking soda – ¼ tsp
Salt – a pinch
Butter – 113 gms (1/2 cup)
Castor sugar – 200 gms( 1 ¼ cup)
Vanilla extract – 1 tsp
Milk – 100 ml (3/4 cup)
Lemon juice – 50 ml (slightly lesser than ¼ of a cup)
Lemon zest – 1 tbsp
For the glaze:
Icing sugar – ½ cup OR powdered sugar + 1 tsp cornflour
Milk – 1 tbsp
Lemon juice – 1 ½ - 2 tbsp

Method:
1.     Preheat oven to 180 C. Grease and prepare the baking dish.
2.     Sieve the flour, baking powder, soda and salt. Set aside.
3.     In a mixing bowl, beat together the sugar and butter until it is light and fluffy.
4.     Add the vanilla, lemon juice and zest to the butter mixture and mix well.
5.  To the above mixture, add the dry ingredients and milk alternately, whisking a little after each addition. Mix until streaks of flour disappear. DO NOT OVERMIX.
6.     Transfer the batter ( batter will be thick) to the dish and bake at 180 C for about 40 minutes or until done.
7.     For the icing: Add the milk to the sugar and mix well. Add the lemon juice and give it a good mix.
8.     Once the cake cools completely, drizzle the lemon frosting on it.
9.     Done.


Recipe Notes:
  •      I didn’t have castor sugar at home. So, I used coarsely ground granulated sugar.
  •     You can use plain powdered sugar as well for the lemon frosting.
  •      I like lemony, tangy frosting and added about 2 tbsps of lemon juice to the frosting. You may adjust the quantity of the lemon juice to suit your taste.


Related Posts Plugin for WordPress, Blogger...