Showing posts with label Chocolate. Show all posts

Saturday, 26 September 2020

4-INGREDIENT OREO TART


 24.09.2020: The time was 8.30 pm. Post dinner, the three of us had retired into our respective nooks in the house. 

Was it time already for the next blog post? I jumped out of the rickety chair and announced loudly that I would be preparing an Oreo Tart. Skip left his candles and dashed to the kitchen as I started barking out instructions to keep butter out of the freezer, to get Oreos from my ‘hiding place’.

The Oreo Tart has been on my ‘list’ for the longest time. However, I always was short of one ingredient. That night I had all the ingredients. I held Skip by his hand and looked him in the eye and told him that we wouldn’t be eating the tart that night as I had to take pictures of it the next day. Skip asked me to finish the photography before he woke up so he could dig right in upon waking up.


That night, Skip and I lay awake till midnight, thinking about the tart in the fridge after having promised each other that we wouldn’t sneak a bite of it. 


Let’s first start with how simple this is. It requires ONLY 4 ingredients, a little bit of blending, heating and stirring and it’s done. Please use the best quality dark chocolate as its taste will stand out. The filling is silky, smooth, fudgy chocolate on a delightful base of crumbly oreos. I wouldn’t recommend adding any additional toppings (chopped oreos, chocolate shavings) as that may get too sweet.

Make this the previous night and it’s ready to be eaten the next day. Choose the dish according to the quantity, you don’t want to end up with thin slices of the tart.


OREO TART

Ingredients:
Oreo biscuits – 24
Melted butter – 2 tbsp+ 3 tbsp
Cream – 100 gms
Dark chocolate – 100 gms
Roasted, chopped walnuts – ½ cup (optional)

Method:
1.     Crush the biscuits in a blender into a fine powder. Add 2 tbsp melted butter to it and give it a quick whizz.
2.     Grease a dish (I used a 7*5 inch dish) and smooth down the powdered Oreos into it to form the base of the tart. Refrigerate it for half an hour.
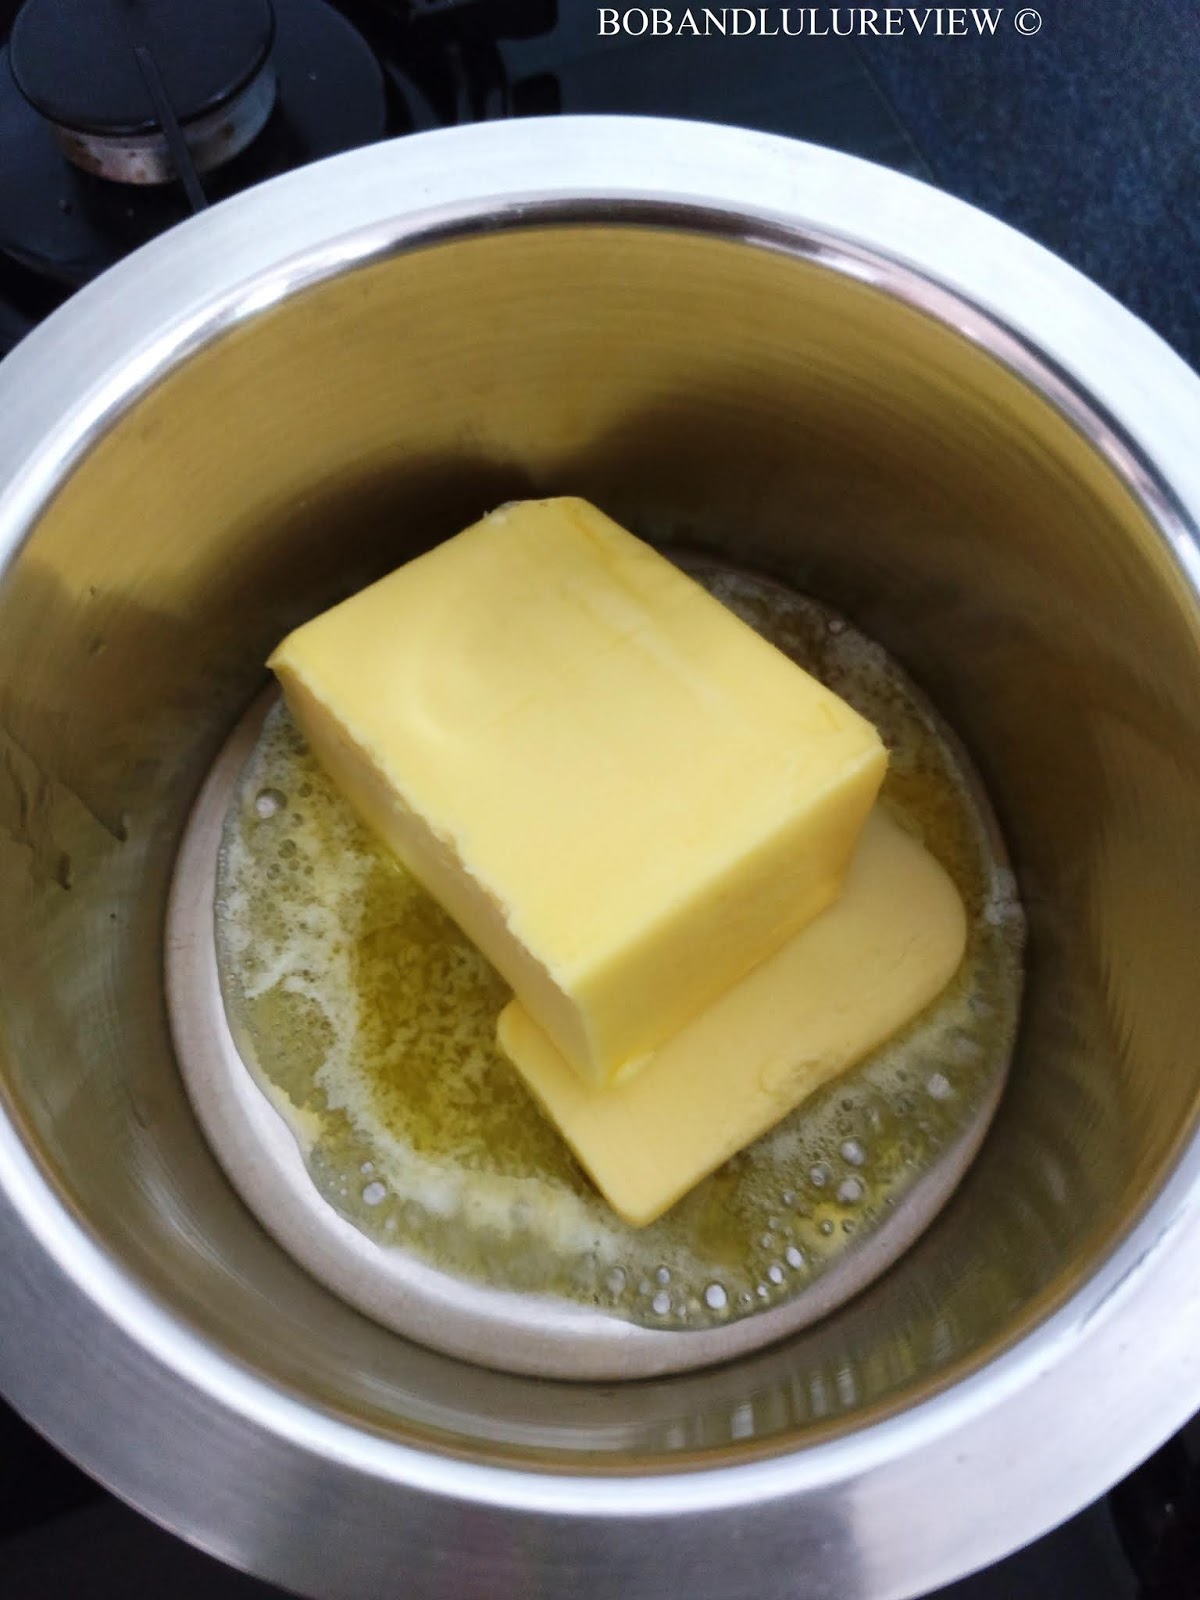
3.    In the meantime, prepare the chocolate ganache. Heat cream and 3 tbsp butter until a gentle boil appears. Remove from heat and add chopped chocolate to it. After a few minutes, stir the chocolate until it fully melts.
4.     Add the chopped and roasted walnuts into the ganache. Once the ganache cools, pour it onto the Oreo base.
5.     Refrigerate for a minimum of 5 hours or overnight.
6.     Done.


Recipe Notes:

  •       Heavy cream would be ideal. I have used the regular Amul cream and the tart tasted great.


Saturday, 12 September 2020

OREO FUDGY BROWNIES


 28.08.2020: Biryani is my nemesis!

Why is Biryani mentioned in a Brownie post, you may wonder?

I had promised D that I would cook egg biryani for him and though we have been making plans for some time now, the virus, a trip, a vegetarian phase, a sneeze have put this plan on hold.

D was to finally have the egg biryani on the 29th. I decided to bake a brownie for him the previous day.

The Oreo Fudgy Brownie was on my list. I had been saving a pack of Oreos for this. The recipe is from Baker by Nature. I have reduced the quantity of sugar by 100 gms and choco chips by a few grams in this recipe.  


As the brownie came out of the oven and I admiringly took it to my balcony to click pictures for the blog, Skip hovered around impatiently tapping his foot. I cut two tiny slices and said the remaining was for D. I sent D a picture of the brownie.

As luck would have it, the next day D couldn’t make it. When I told Skip this, a smile broke out on his face and he headed to the kitchen.

I love brownies and there are so many different recipes available. The kind I like best are the ones with crinkly crusts, chewy edges and fudgy centres, with bits of walnuts and choco chips and a sprinkling of sea salt.  


This brownie is all of that plus Oreos. Yumm, yumm! The taste of the Oreos does not overpower that of the chocolate but it does lend a lovely crunch to the brownie. This brownie tastes quite different from the Ooey Gooey Fudge Brownie. You could also try this without the Oreos and it would taste just as great. If you love brownies, you must bake this one and please do follow me on Facebook and Instagram @lucidlucent.


OREO FUDGY BROWNIES
Ingredients:
Unsalted butter – 170 gms (3/4th cup)
Sugar (granulated) – 200 gms (1 cup)
Oil – 35 gms (3 tbsps)
Vanilla extract – 2 tsps
Eggs – 2 large plus 1 egg yolk
All-purpose flour (maida) – 95 gms (3/4th cup)
Cocoa powder – 43 gms (1/2 cup)
Chocolate chips – 100 gms (1/2 cup)
Oreo cookies – 12
Salt – a pinch

Method:

1.     Preheat the oven to 175C and grease a baking dish.
2.    Combine butter and 100 gms sugar in a saucepan and cook until the butter melts completely. (I took it off the heat once the butter had melted, please note the sugar hadn’t melted)
3.    Remove from heat and while the mixture is still hot, stir in the oil and vanilla. Set aside.
4. In a mixing bowl, whisk the eggs, egg yolk and remaining sugar until well combined.
5. Slowly add the warm butter mixture into the egg mixture, very gradually, whisking it constantly until it is well combined.
6.   Add the flour, cocoa powder and salt to the above mixture and gently fold with a rubber spatula until it is just combined.
7.    Chop the oreos roughly and fold in half with the choco chips.
8.  Pour the batter into the baking dish and arrange the remaining oreo cookies on top.
9.     Bake for 27-30 minutes or until the top is shiny and slightly cracked.
10. Done.

Recipe Notes:
·       The original recipe calls for 300 gms sugar. I have reduced it to 200 and the brownie was sweet enough.
·       The original recipe calls for cooling the brownie for 2 hours before slicing it. Hmm… I waited for half an hour (and that itself felt like an eternity) and then sliced it.


Saturday, 1 August 2020

CHOCOLATE LEAVES


03.07.2020: At around 11 in the morning, I received a message from my father-in-law’s phone saying “I’m hungry, bake a cake” followed by a gif of Jerry the mouse rubbing his tummy and pointing at his mouth.

Skip came running up the stairs asking me if I saw the message sent from thatha’s phone. “I sent it and not Thatha” said he. “It’s Thatha-Thai’s anniversary, you must bake a chocolate cake”.

Kaveri: “Why, chocolate?”
Skip: “I like chocolate”
Kaveri: “It’s their anniversary, how about …”
Skip: “I’ll be eating it too and I like chocolate”

I pulled out my heart shaped baking dish and decided to use the strawberry flavoured icing sugar. The idea was promptly shot down by Skip. As I sat wondering how to decorate the chocolate cake, Skip suggested we use mint leaves on top and that is when I remembered having seen a video of chocolate mint leaves. I had been meaning to make them since long.

The “nests” that you see on the cake are tiny chocolate bundt cakes rolled in white chocolate shavings. I used white chocolate instead of dark as I wanted a contrasting colour on the cake. I would however recommend using dark chocolate as it is easier to work with. White chocolate is buttery and soft and more delicate than dark chocolate.


I have used hibiscus leaves; mint leaves are great too as they have deep serrated margins. You may also use these as toppings for cupcakes. Do wash the leaves and dry them well before you use them.


CHOCOLATE LEAVES

Ingredients:


Chocolate (white/milk/dark)
Leaves with serrated edges and margins
Spoon/paint brush


Method:


1.   Melt chocolate either in short bursts in the microwave or using the double boiler method.
2.    Let it cool for a few minutes.
3.    Coat the underside of the leaf with a layer of chocolate with a spoon or a paint brush.
4.Lay it on a plate/butter paper (chocolate side up) and leave it in the freezer for about 10 minutes until the chocolate hardens.
5. Remove from freezer and gently peel the leaf off.
6.     Done.


Saturday, 13 October 2018

CHOCOLATE CHIP COOKIES


I’ve been looking for the perfect choco chip cookies forever! When Skip was in playschool, one of his friend’s mum had baked heavenly choco chip cookies. They were firm and chewy with a hint of sea salt in them. I’ve had that recipe for over 3 years now and had still not baked it.


This is not that recipe. That recipe intimidates me because of the long list of ingredients even though I keep telling Bob that it’s often the many-ingredient recipe that turns out the simplest to make.

Skip wanted a worm shaped cookie


I have been addicted to watching cooking videos on Facebook and love the videos shared by Tasty. They look simple to make and most of them use few ingredients. Their choco chip cookie recipe looked interesting and I had brown sugar at home. (I rarely do).


I struck out the other two choco chip recipes from my recipe book. These were soooo good. These are crunchy and chewy. The texture of a cookie depends on how long the dough is refrigerated and the baking time. The longer the dough is refrigerated, the deeper the colour the cookie acquires and also has a more caramel-ly flavour. (I refrigerated it for 3 hours).


I have also said this earlier, stick to shorter baking time for cookies. Cookies harden upon cooling. So don’t wait for the cookie to harden while baking else you’ll end up with either burnt cookies or hard ones. The longer you bake, the crispier they turn.

CHOCOLATE CHIP COOKIES (MAKES 36 COOKIES)

Ingredients:
Granulated sugar – 100 gms (1/2 cup)
Brown sugar (packed) -  120 gms (3/4 cup)
Salt – 1 tsp 
Unsalted Butter (melted) – 115 gms (1/2 cup)
Egg- 1
Refined Flour (Maida) – 155 gms (1 ¼ cup)
Baking Soda – 1/2  tsp
Vanilla Extract – 1 tsp
Chocolate chunks (chips) – about 220 gms.

Method:
1.   In a large bowl, whisk together the sugars, salt and melted and cooled butter until a paste forms.
2.  Whisk in the egg and vanilla, beating until light ribbons fall off the whisk.
3.  Sift in the flour and baking soda, then fold the mixture with a spatula. (Do not over mix).
4. Fold in the chocolate chunks and then chill the dough for a minimum of 30 minutes.
5.    Pre-heat the oven at 180C for 5 minutes. Roll the dough into walnut size balls and bake until the edges have started to barely brown (it took me about 10 minutes in my oven).
6.     Cool completely before serving.
7.      Done.

Recipe notes
·        Do not forget the preheat the oven, even between baking two batches.
·      Whilst a batch is being baked, let the dough remain in the fridge. When the dough is cold, the cookies are chewier.
·    These cookies spread, so roll them into a small ball and then bake. Do not flatten them else they’ll further spread and burn. 
·    I added only a 100 gms of chocolate thinking 200 gms would be too much. But I realized it was too little when I was rolling the dough into balls.
·     I have mentioned a reduced quantity of brown sugar as the original recipe makes the cookies a tad bit sweet.
·      You may substitute the chunks of chocolate with choco chips.


Look what I found in the garden?

The Last Leaf!

Friday, 11 May 2018

CHOCOLATE MUG CAKE (Eggless)


Ever been in a similar dire situation?

Time – 11.00 p.m, ‘hunger pangs’ level- extreme, snacks in pantry – nil

What if I told you that you could make yourself a moist chocolate cake as a late-night snack and it would take you only 5 minutes! (5 minutes, if you are slow)

I had been on the lookout for a mug cake recipe that tasted like a convection oven baked cake. Skip had attended a baking class where he got the recipe for a decadent mug brownie, but that required brown sugar, which I rarely have at home. (Shall post the Mug Brownie recipe when I next buy brown sugar) I found this perfect mug cake recipe on Ria’s blog. I have made a few changes in the quantity of the ingredients.


Skip loves baking these mug cakes as they are simple and quick. The recipe calls for choco chips but Skip loves experimenting. Last week he added mini Cadbury Dairy Milk squares into the cake (they tasted yum!). He wants to add chunky peanut butter next.

If you are craving for something sweet or need a dessert in a jiffy, this is a perfect recipe. It tastes exactly like a ‘proper’ chocolate cake and most ingredients are readily available in your kitchen. We use oil instead of butter and the cake is eggless. 

Impress your guests by baking them an ‘impromptu’ chocolate cake ;) or if you don’t know what to give your mom on Mother’s day, how about a Mug Cake.


This cake can be baked by anyone over the age of 3. (Kids between ages 3-10 need to be supervised while using the oven)

CHOCOLATE MUG CAKE

Ingredients:

Flour – 3 tbsp
Sugar – 4 tsp
Cocoa powder – 2 tbsp
Baking powder- ¼ tsp
Pinch of salt
Milk – 4 tbsp
Oil – 3 tbsp
Chocolate chips - 2 tbsp (optional)
Splash of vanilla (optional)

Method:

1.      In a 200 ml mug, add the dry ingredients and mix well with a fork.
2.      Add in the wet ingredients and chocolate chips and mix well.
3.      Cook it in a microwave oven for 90 seconds.
4.      Done.

Recipe notes

·        The timing may vary as per your microwave oven’s specifications.
·        Be careful when you get the mug out. Let the cake cool for a bit and then dig in.
·      Make sure to mix the ingredients well else you’ll have a layer of powdery flour at the bottom.
·    You can experiment with this cake and add choco chips, shaved chocolate, choco-caramel bars etc. into the batter or post baking, top the cake with ice-cream, chocolate/caramel sauce, nuts, etc. 

I was plucking clovers for the picture and look what I found underneath one of the leaves.


A baby snail in its shell!
 HAPPY MOTHER’S DAY! J


Thursday, 5 April 2018

OOEY GOOEY FUDGE BROWNIE


What kind of brownies do you like?

I like the dense, fudgy ones the best. The ones with crinkly tops, crumbly edges and gooey and chocolatey centers. I have been on a quest for that perfect fudgy brownie recipe since a long time and then Shugz shared this picture of the most delectable brownie ever. After zooming in and out of the picture a few times, I asked her for the recipe, which, as usual, she promptly shared. I have three other brownie recipes in my book, against which I put a tiny cross after I baked this one.

What I love best about these brownies is that they can be fudgy, chewy or cakey. When eaten on the same day, it’s fudgy. After a night in the refrigerator, they are chewy and if baked for slightly longer they are cakey.

These brownies are best when baked a day in advance and then stored in the fridge, so you can serve them either warmed in the microwave oven for 40 seconds and then topped with ice cream, caramel sauce and chopped nuts or just let it thaw and eat them plain.


A brownie isn’t a brownie without that crinkly crust. The first time I baked it, I used the beater to mix the ingredients and the crust came out looking smooth, though the insides were fudgy. I then learnt from Shugz that one shouldn’t ‘over-beat’ the brownie batter.

Hence, this time I used the beater only to mix the sugar and butter as Skip said it would be no fun baking a cake if we didn’t use the Jhurrrrrr. I then gently folded the remaining ingredients with the whisk that Hershey gifted after my ‘beating eggs in the food processor/mixie and cake falling flat’ episode.  *eye-roll*


This is a picture of the finished batter. It is supposed to be thick and gritty.


OOEY GOOEY FUDGY BROWNIE
Ingredients:                                                                            
Unsalted Butter (melted and cooled)- ½ cup
Sugar – 1 ½ cups
Eggs- 2
Flour- ¾ cup
Unsweetened cocoa powder- ½ cup
Baking soda- ¼ tsp
Salt- ¼ tsp
Chocolate chips – 1cup
Vanilla essence – ½ tsp
Walnuts- ½ cup (optional)

Method:

1.      Pre-heat oven at 180C.
2.  In a bowl, combine sugar, melted butter and vanilla extract until smooth and fluffy.
3.      Sift together the flour, cocoa powder, salt and baking soda.
4.      Beat the egg, one at a time into the sugar/butter mixture. Mix well.
5.      Add the dry flour mixture in 2-3 additions mixing slowly until combined.
6.      Toss choco chips and walnuts in about 1 tbsp of flour and fold into the batter.
7.    Pour into greased dish. Bake at 180C for 20-25 mins. DO NOT OVER-BAKE. The toothpick should not come out clean. There will be streaks of batter/melted chocolate on it.
8.      Done.

Recipe Notes:

·       I’ve sprinkled powdered sugar on the brownie.
·    Instead of chocolate chips, I’ve used chunks of cooking chocolate. It makes the brownie even more chocolatey. As these chunks are also sweet, I reduced the quantity of sugar to 1 ¼ cups.


Related Posts Plugin for WordPress, Blogger...